Basic Setup
first things first you will need the following items
- Raspbery pi (with wireless its better to use the pi0W but you can use a pi3)
- MicroSD card (at least 8 Gb)
- SD card reader(Duh!)
- and a little patience (some times things wont got to plan accept this and take a breath
 )
)
Step 1 - Installation of the Pwnagotchi .img
head over to https://github.com/evilsocket/pwnagotchi/releases and grab a copy of the the .img once the file has downloaded you will need write it to the SD card. there are a few ways to do this.
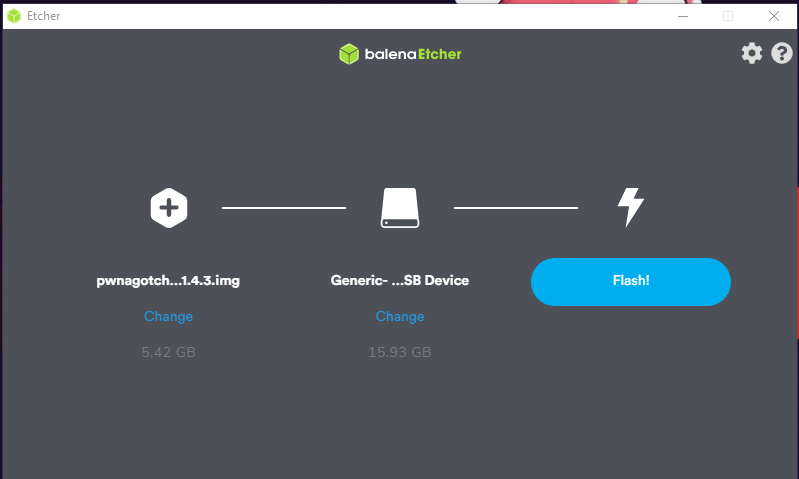
The way i will be using a tool called balenaEctcher (https://www.balena.io/etcher/) now that we have everything we need lets get started.
open up the program and select the img and the device you want to write to . (make sure you dont write over a pendrive you forgot was plugged in … i have a friend who did this ) and it should look somthing like this :
once that is done writing eject your sd card and then put it back it . the SD card should Pop up in the file explorer menu. once we have that then right click on on the the root of the boot partition and create a new text document and name it config.yml then open it up and paste in the following:
main:
name: 'pwnagotchi' # change this to what ever you want to call the device
whitelist:
  - 'YourHomeNetworkMaybe'
plugins:
  grid:
    enabled: true
    report: true
    exclude:
      - 'YourHomeNetworkMaybe'

ui:
  display:
    enabled: false
    type: 'waveshare_2'

web:
  address: 0.0.0.0
  enabled: true
  on_frame: ''
  origin: ''
  port: 8080
  username: '' #your username
  password: '' #your password
once you have done this then you can eject the sd card and put it in your pi the first time it boots it will take some time so just wait. once the green LED stops blinking you should then be able to connect to the pi via usb. and you will hear the “new hardware detected” sound this is the rnds gadget being installed (to connect via usb)
#Step 2 - Connecting to the RPI
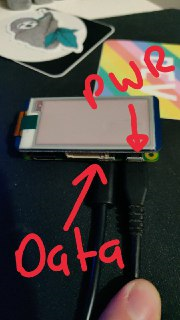
So on the pi0w there are 2 mirco usb ports the one that is closer to the hdmi port it the data one and the one at the top is the power one.
now to connect to the pi we will need to use ssh. i normally use putty to ssh in windows (PuTTY: a free SSH and Telnet client) in the hostname field type in the following pi@10.0.0.2 and make sure the port number is 22 type the name of your pwnagotchi into the ‘saved sessions’ box and click save.
now we need to set the address of the usb network. goto the control panel and open the network and sharing centre and there will be another connection on my system it is called “Ethernet 2” it may be somthing else on yours.
open the properties section goto ip 4 and properties to set the ip adress to a manual IP
ip address: 10.0.0.1
subnet: 255.0.0.0
gateway: leave this blank

prefered dns: 1.1.1.1
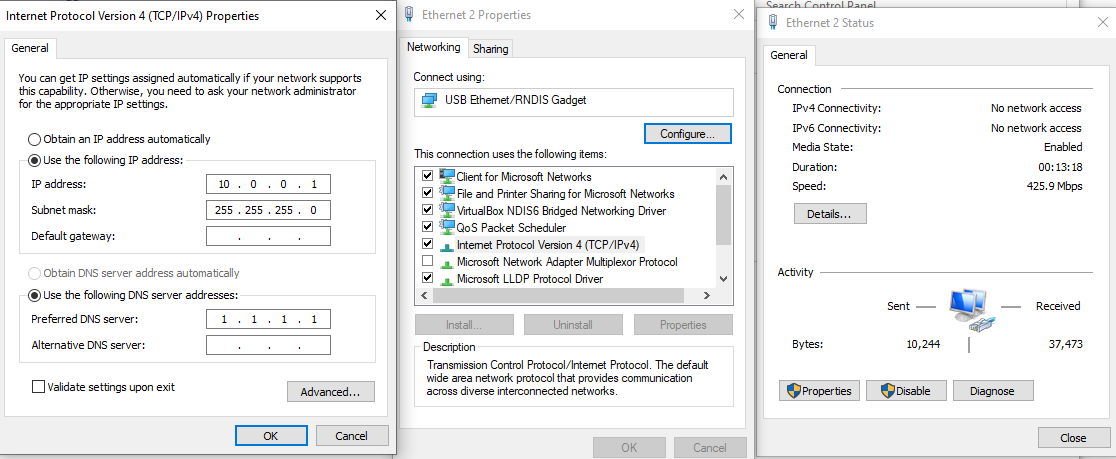
and save this.
now go back to putty and you should now be able to connect to the pi with the following creds
  user: pi
  password: raspberry
Congratulations ! you are now connected to the pi ![]()
once you are logged in run the following commands:
passwd (this will allow you to change your password from raspberry to what every you like)
sudo su (this will switch you to the root user )
systemctl status pwnagotchi (this will show you what the pwnagotchi is currently upto)
if you see a message in the log that says web ui available at http://0.0.0.0:8080 that means that your Pwnagotchi is now set up as a headless device.
navigate to the url in your chosen web browser (mines chrome) you will be prompted for a username and password these are set as default to changeme:changeme. dont worry about that now that you have access to the web interface wou can go into the web config menu and change them.
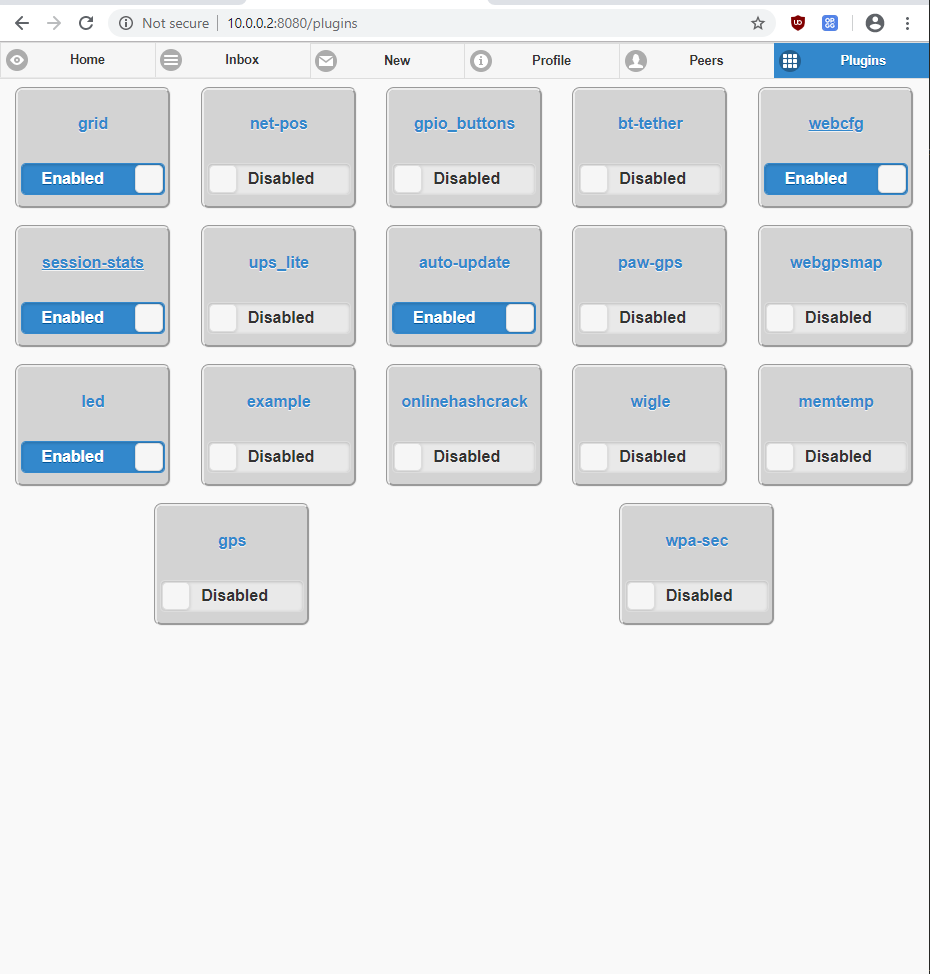
from here you can search for the settings and change them search for ui.web.username and enter it
ui.web.password and enter it
then save it and go back to 10.0.0.1:8080
restart in auto mode and viola you are done ![]()